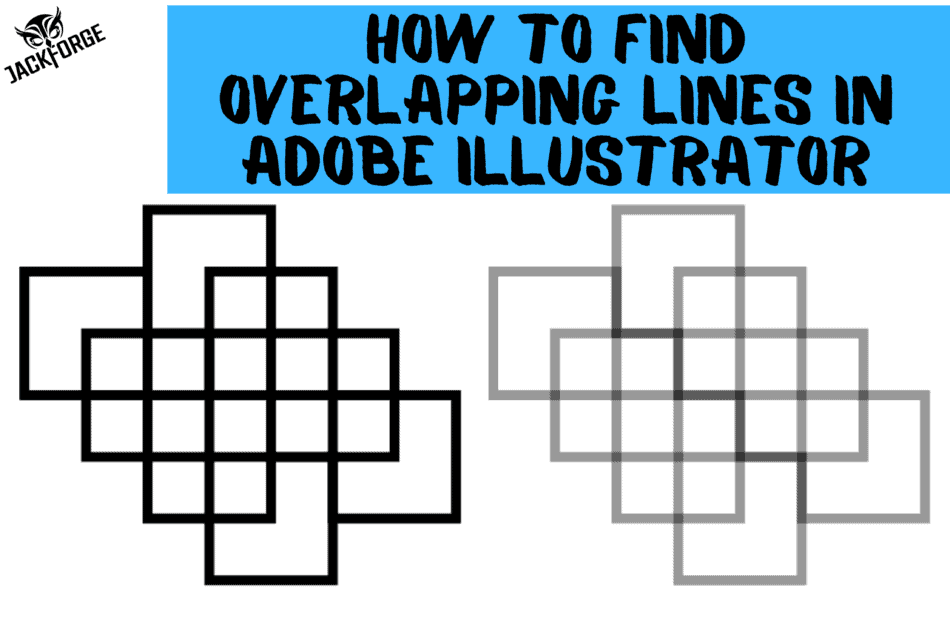
When creating designs for a CNC laser cutter engraver, it is important to avoid overlapping lines in your artwork. If you don’t take the appropriate steps to eliminate them, the laser head will perform additional passes along the same path which can result in excessive burning, uneven results, and unintentional cut-throughs.
Although laser cutting software will easily identify overlapping lines, it can be much more difficult and time-consuming for us to find them since they appear as a single line on a computer screen.
Unfortunately, Adobe Illustrator does not have a readily available option to eliminate overlapping lines since they are not an issue when using the software for its intended purpose: graphic design.
The good news is that there is usually a trick or workaround that can be applied to help us with pesky tasks such as this one.
If you would like to learn how to quickly find overlapping lines in Adobe Illustrator, continue reading.
Understanding Overlapping Lines
For those of you who may not be familiar with this topic, this section is for you.
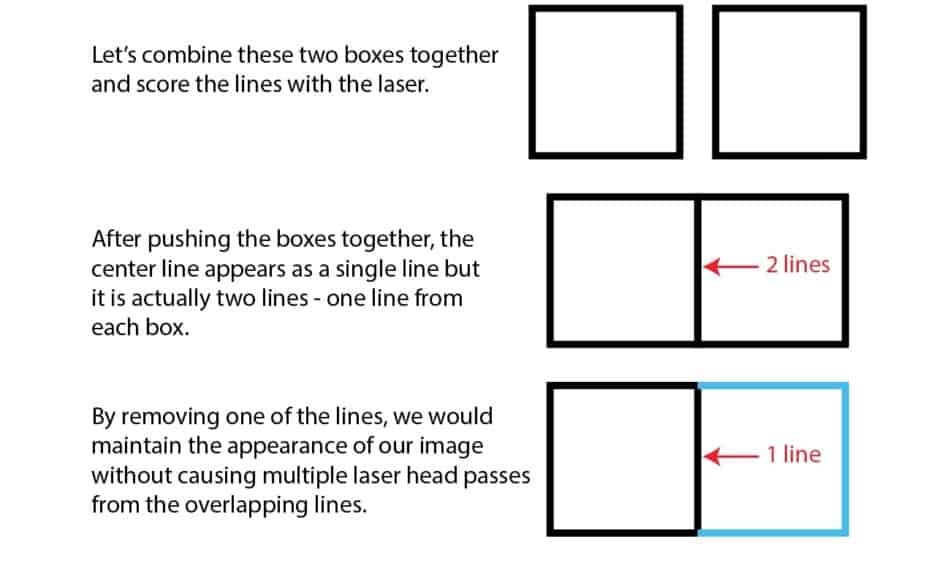
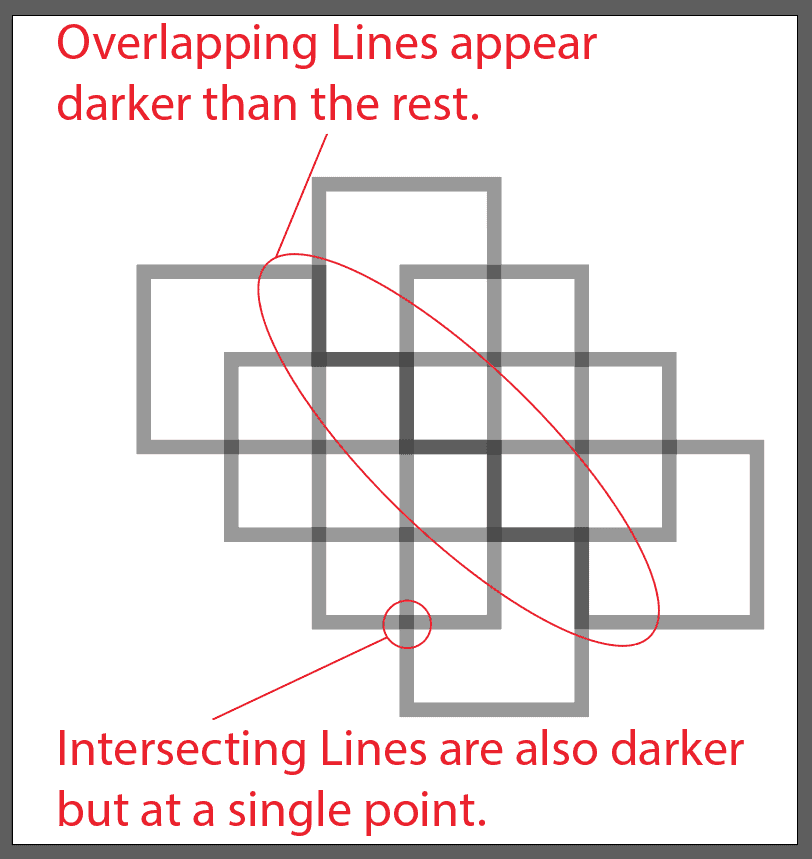
Overlapping lines sit directly on top of one another for any amount of distance greater than a single point of intersection.
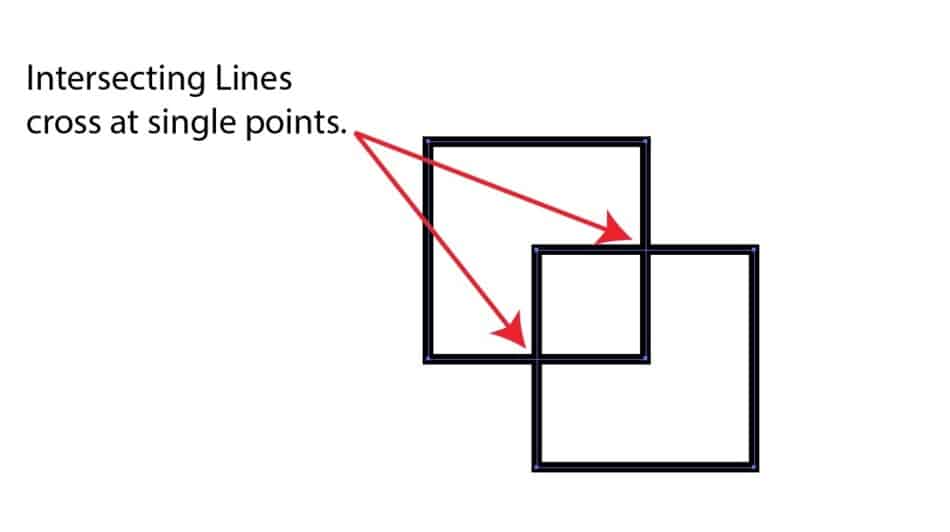
Lines that cross one another at a single point are intersecting lines. Intersecting lines do not usually affect your results because the time in which the laser spends at the point of intersection is minimal.
*This may not hold true for all lasers; therefore, you should evaluate your laser’s results by scoring some intersecting lines.
Check out the examples below for a better understanding.
Overlapping Lines
Intersecting Lines
Finding Overlapping Lines in Adobe Illustrator
Now that you know what overlapping lines are and the issues they can cause, follow these simple steps to help you identify them.
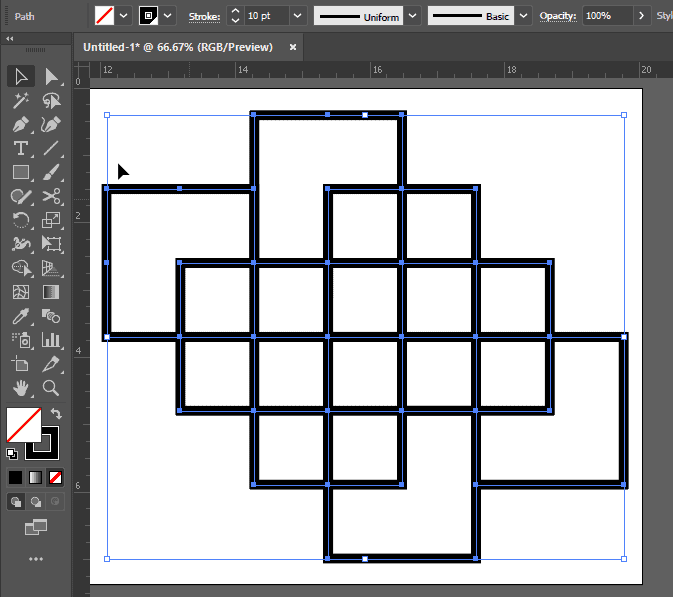
Step 1
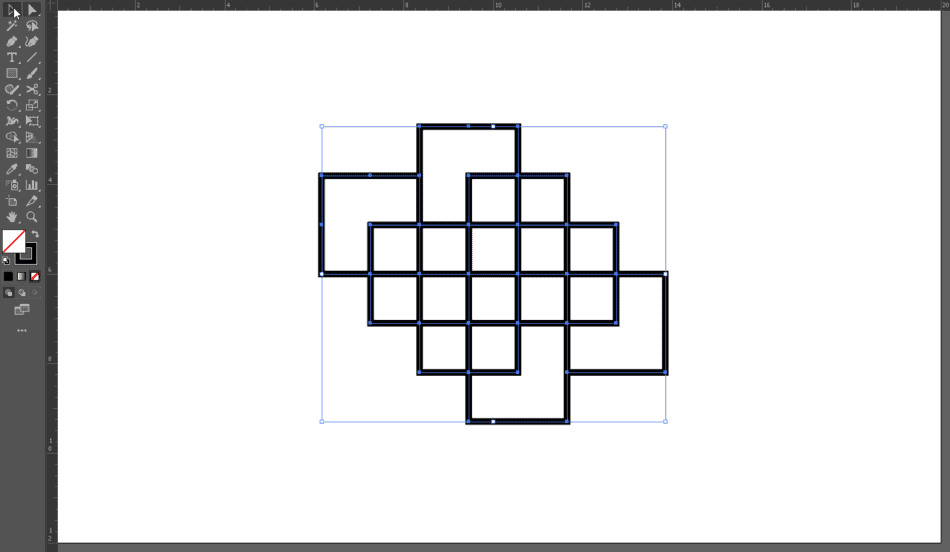
Using the Selection Tool, select your desired paths. *Make sure they are completely ungrouped or this process will not work.
Step 2
Change the Stroke Color of all the selected paths to the same color (black works best for me). Increase the Stroke Weight to 10 points for easy viewing. The stroke weight may need to be reduced depending on how close your lines are together.
Step 3
Decrease the Opacity to somewhere around 40%.
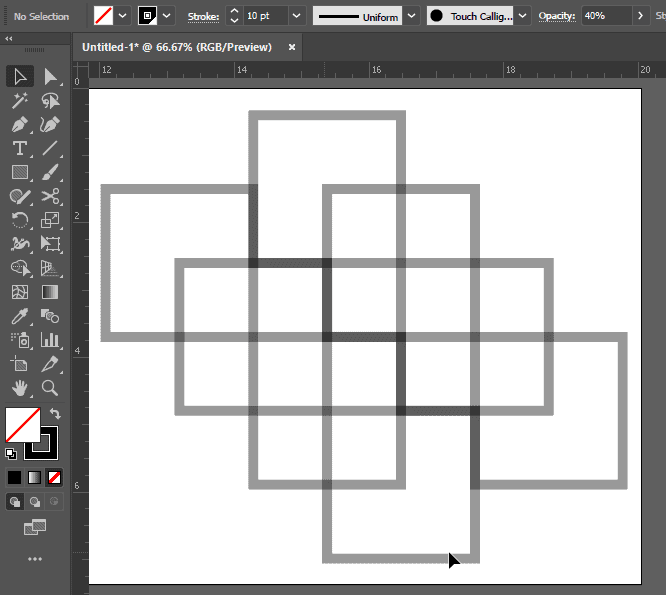
Step 4
Now, you can easily identify overlapping lines as they appear darker.
Using an Adobe Illustrator Action to Find Overlapping Lines
If you thought that was a good find, you will really like this next tip!
The whole process can be simplified down to the touch of a button by applying an Adobe Illustrator Action. You can build your own using the commands below or you can download my premade Action for free from the downloads page.
The specific commands, in order, for building this Action are as follows:
Select the object or objects with the Selection Tool
Change the opacity to 40%
Set the Stroke Weight to 10 points.
For anyone who doesn’t know how to build an Action, see the section Splitting Paths Quickly Using an Adobe Illustrator Action in the article How to Quickly Split Paths for Laser Designing.
Alternatively, you can find more information about Actions in the Adobe Illustrator User Guide by clicking here.
As always, I hope this tutorial will assist you in your design workflow. If you have any questions, please feel free to send an email to answer@jackforge.com.
Happy Laser Crafting!
