Have you ever wondered what influences the Glowforge order of operations every time you upload an image file? Or how commands like engrave, cut, and score are sometimes automatically selected for different sections of a design? I know I have, so I did some research to figure it out.
Now, you may be wondering why knowing this even matters or how it could benefit your workflow. Well, if you continue reading I intend to explain my findings on how the Glowforge interface sequences different commands and why it matters.
I will also show you how to create your own Adobe Illustrator color palette so you can improve your workflow efficiency.
Reviewing Some Terms
Before we really dive in, let’s clear up a few terms for those who may be new to designing for the Glowforge.
Fills and Strokes
According to adobe:
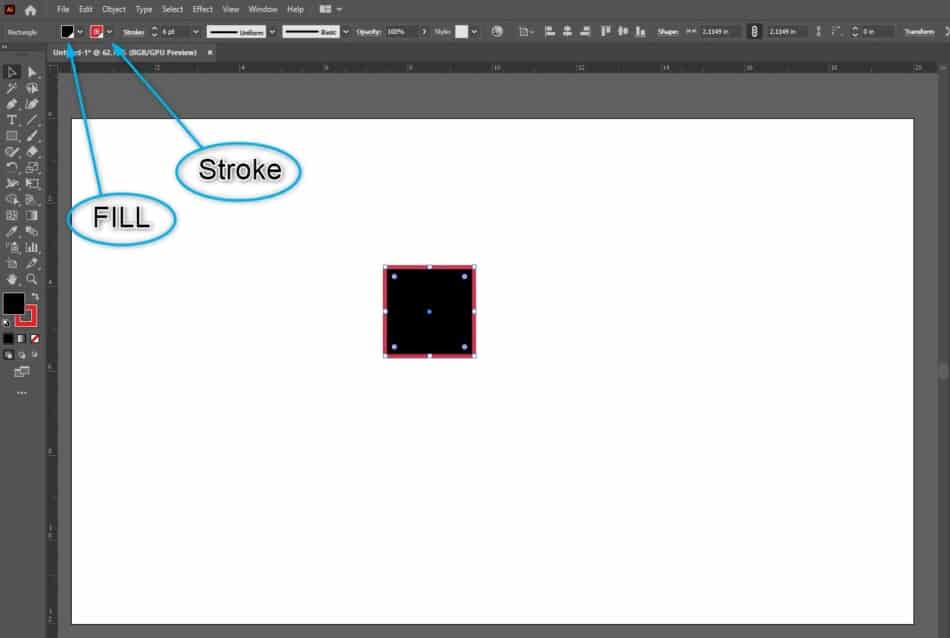
- A fill is a color, pattern, or gradient inside a shape or object.
- A stroke can be the visible outline of an object, shape, or path. The color of the stroke can be changed.
You can change the color of the strokes and fills in a few different ways. One way is by clicking the drop-down arrows seen in the picture below.
Number and Type of Command Blocks
The Glowforge determines the number and type of commands based on the fills, strokes, and colors that make up your digital image file. There are also commands based on the type of digital image file (raster images and vector images); but for the purpose of this article, we will focus on vector images.
*For vector images: Total number of command blocks = number of fill colors + number of stroke colors
The Glowforge interface recognizes fills as the engrave command and strokes as the cut or score command.
Although these commands can be swapped manually from within the Glowforge interface, doing so also swaps the fill and outline which may alter your intended results.
Colors for fills and strokes are independent of each other so using the same exact color for a stroke and fill will create two command blocks.
For example:
- A square containing just a black stroke will produce one command block.
- A square containing just a black fill will produce one command block.
- A square containing a black fill and a black stroke will produce two command blocks.
If you are lost, do not worry as it will make much more sense when you start uploading designs to your Glowforge.
Glowforge Order of Operations
The Glowforge order of operations is simply the sequence in which the laser performs its commands, e.g. engrave, stroke, cut, etc.
Take a look at this simple example below.
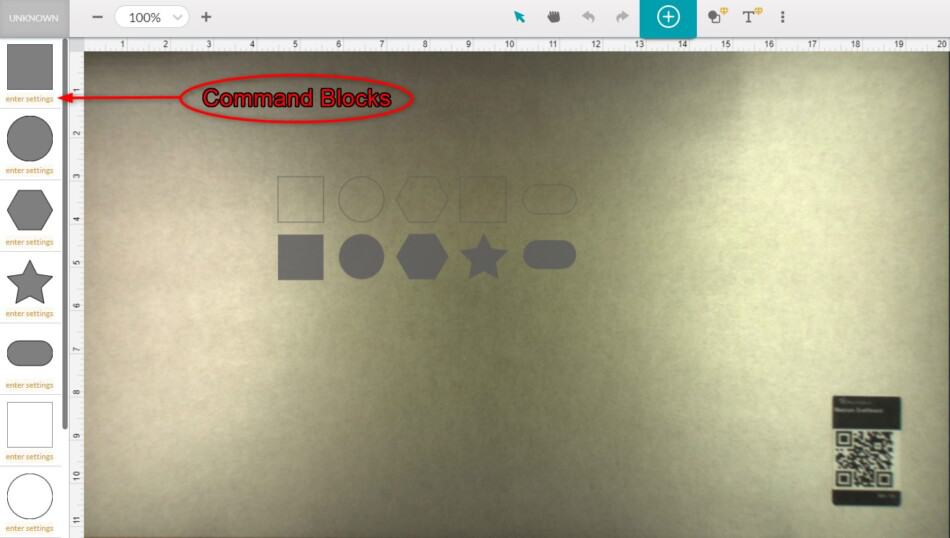
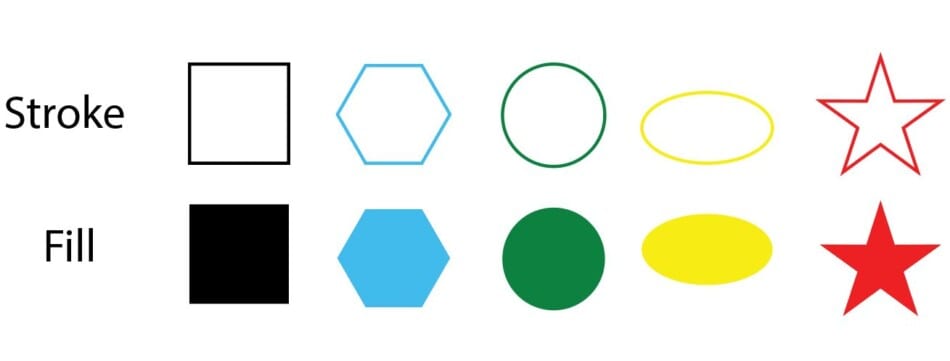
This file has 5 shapes containing only a fill, 5 shapes containing only a stroke, and the same 5 colors in both groups for each shape.
When this file is uploaded to the Glowforge, it will create 10 command blocks as seen on the left side in the picture below.
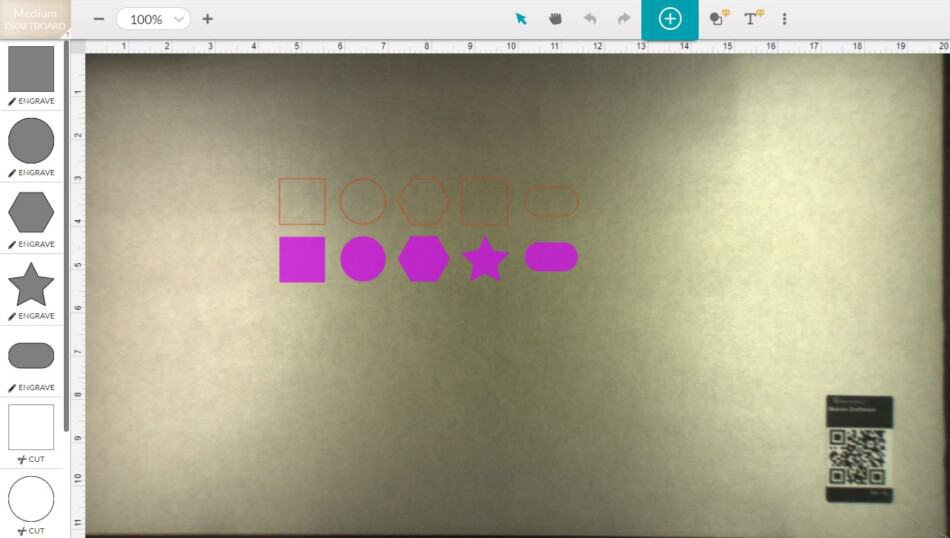
The Glowforge laser will complete each command block starting at the top of the list. First, it will engrave the square. Next, it will engrave the circle. Then the hexagon, and so on.
The order of these blocks may initially seem to be chosen by the Glowforge interface at random, but they are not. Keep reading to find out how they are chosen and why you would want to customize them.
Why Would You Want to Customize the Order of Operations?
Customizing the order of operations can improve the quality of your laser projects.
For example, cutting a design out prior to engraving can easily offset the originally intended engraving locations. When cutting any item out of material, there will usually be some movement when the cutout becomes an independent piece.
Customizing the order of operations can save material and time, especially when there may be skepticism about how a particular part of a design may turn out.
For example, if you wanted to engrave multiple areas but were concerned some areas may overlap from being too close together, you could engrave those areas first. This would allow you to check the quality and potentially abort the process to make adjustments before investing a significant amount of time.
I can’t stress enough how much of a bummer it is to find mistakes in your design after the laser has already been operating for an hour!
How Does the Glowforge Determine the Order of Operations?
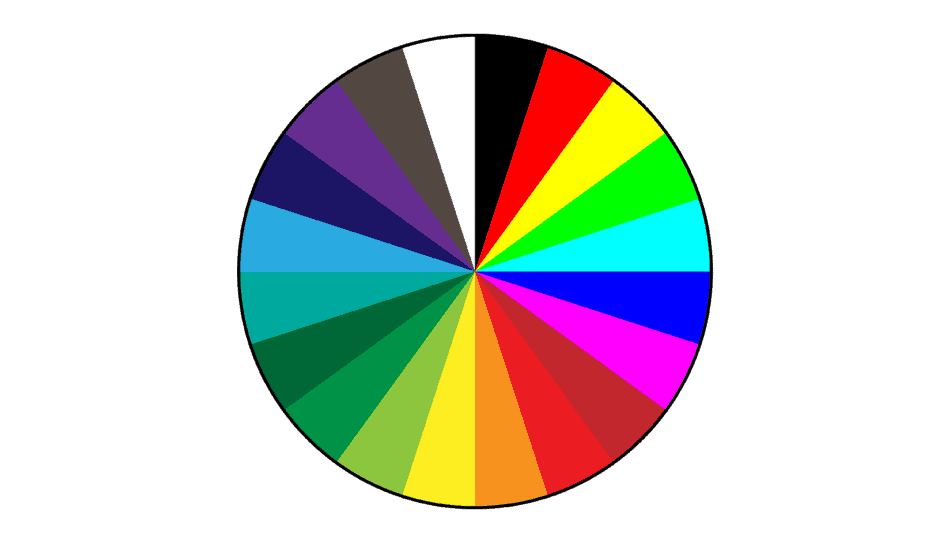
The Glowforge interface lists fills (engrave) before strokes (cut/stroke). The fills and strokes are further ordered by their colors.
I have not figured out an exact pattern to how one color comes before another; however, this isn’t really important as long as we can establish a specific order within a group of colors.
Of note, it is possible to change the order of operations from within the Glowforge interface as long as the command you want to re-sequence has its own command block. Again, this is achieved by using different colors during the design process.
As you continue to learn and practice designing for the Glowforge, planning for the Glowforge order of operations will become much easier from within Adobe Illustrator or any other design software!
How to Create Your Own Color Palette for the Glowforge Order of Operations (Adobe Illustrator CC 2020)
Step 1
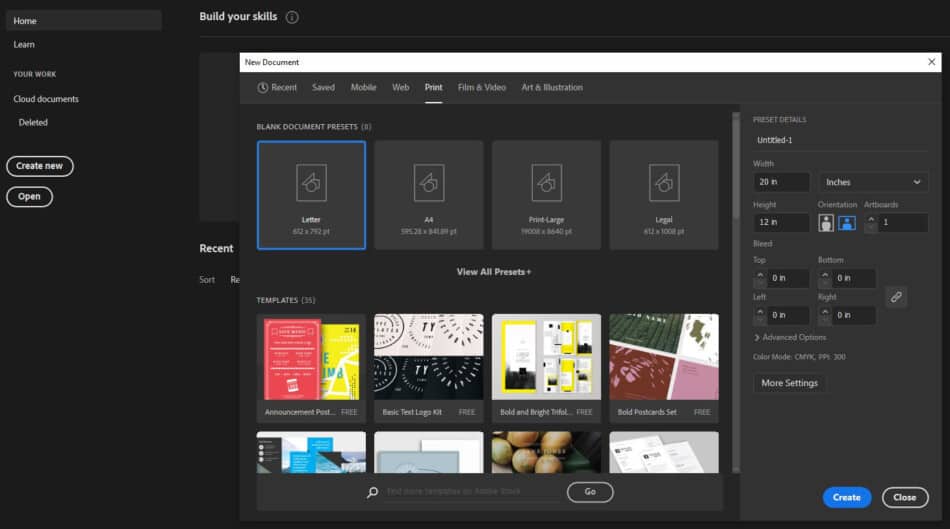
Create a new Adobe Illustrator file by selecting Create new. Click on the Print tab, select Letter, then Create.
Step 2
Using the Selection Tool (V), change the fill to black. Change the stroke to none. Refer to the picture under the section Fills and Strokes above if you are unsure where to make these changes.
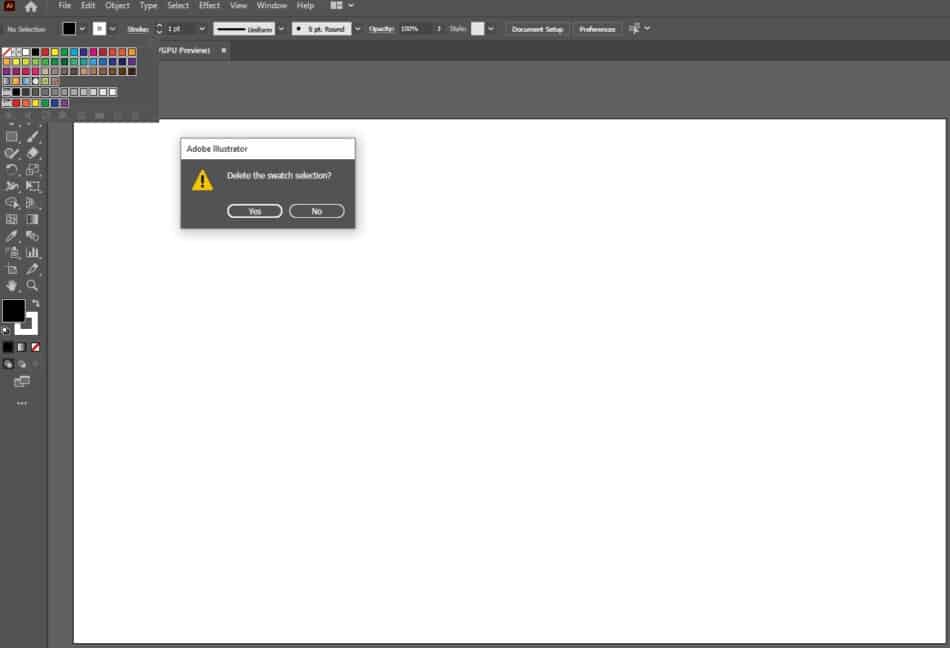
With the stroke box open, hold shift on the keyboard, left-click on the white box one time, and then the purple box one time to highlight all of the colors.
If for some reason you do not have the same colors in your swatches as I do, just left-click on the first color after the Registration box (the icon that looks like crosshairs), and then the last color one time to highlight all of the colors.
Then click on Delete Swatch (the icon that looks like a trash can) to delete.
Step 3
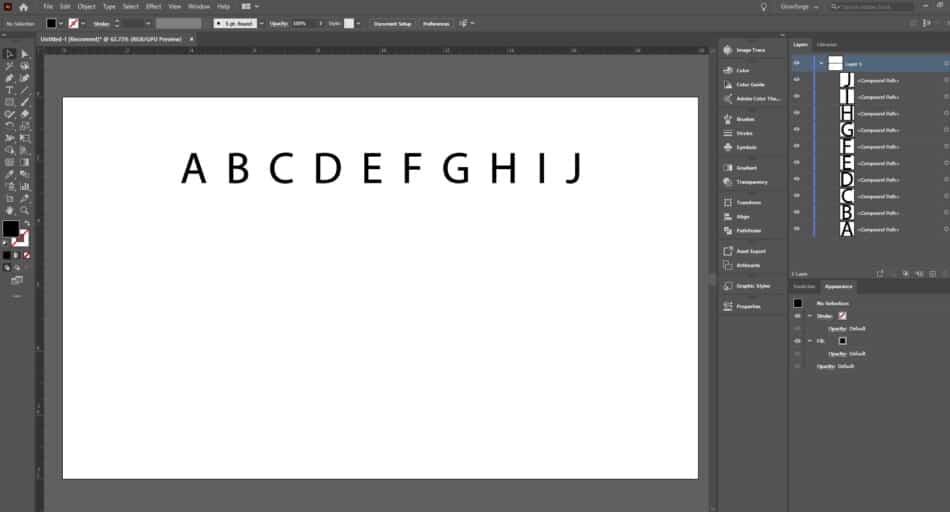
Select the Type Tool (T). Drag out a Text Box. Type out some letters in alphabetical order. (I will type A through J, but if you want more than 10 colors in your palette, type out more letters.)
*I chose to use letters because they can be easily identified once they are uploaded to the Glowforge.
Increase the font to 100 points for easy visibility.
Using the Selection Tool (V), select the text box with your letters, then select Object>Expand (Object)>OK. With the letters still selected, select Object>Ungroup.
Now you have multiple individual letters like the picture below.
Step 4
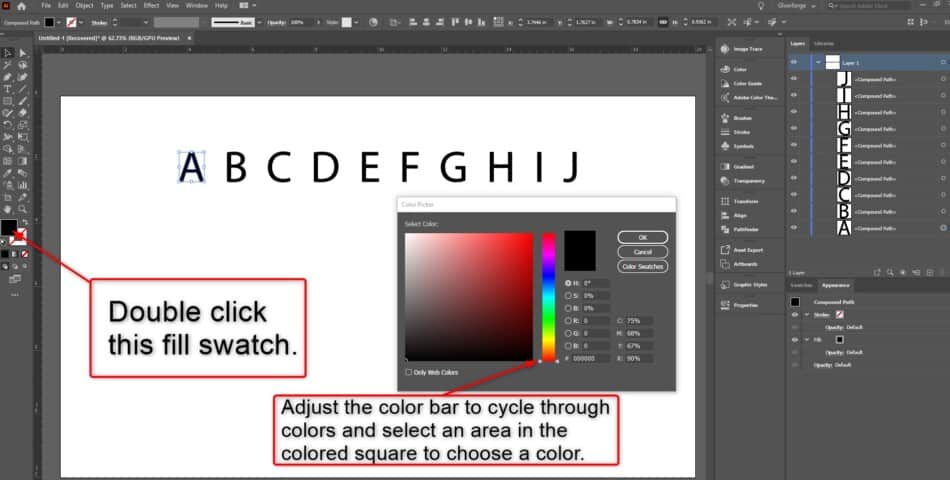
Using the Selection Tool (V), select the letter A, then double click the fill swatch in the left side toolbar to pull up the color picker. Choose different fill colors for each letter.
Adjust the vertical color bar in the color picker to change the colors within the color picker square. Select a spot within the color picker square to find your desired color. Then select OK to recolor your letter.
Alternatively, you could Google a list of HEX color codes such as the one found by clicking here. Then type the HEX code with your desired colors in the # box seen in the color picker.
Repeat this process for each letter until they are all different colors.
Step 5
Save the file as an SVG by clicking File>Save as. Under Save as type, select SVG. Change the file name to something like Test Palette. Save the file to a location you will remember. Leave Adobe Illustrator open.
Step 6
Upload the file to the Glowforge interface by selecting Create>Upload from file in the Glowforge dashboard. Navigate to the location of the Test Palette you just created, then double click it.
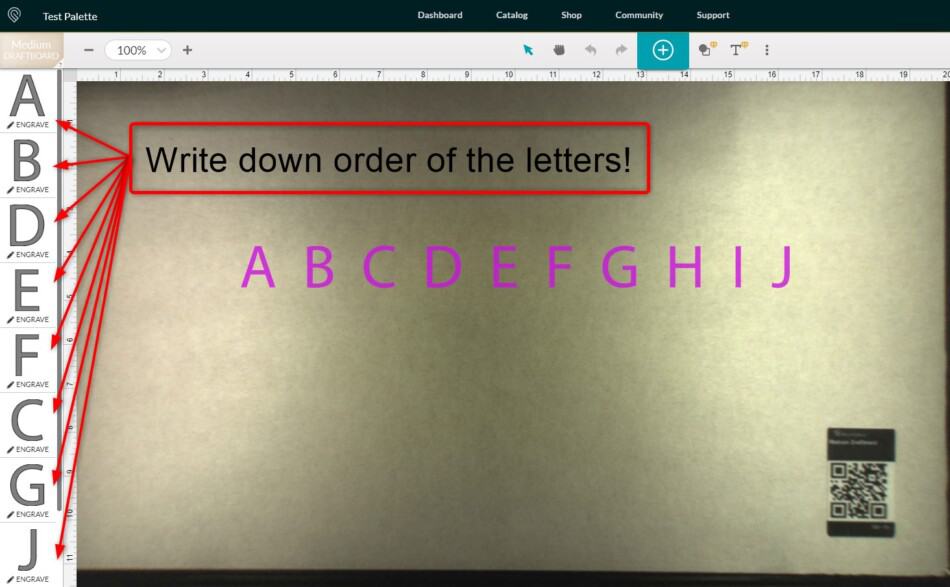
Write down the order of the command blocks for the letters from top to bottom. Based on the colors I used, the order is as follows:
- A
- B
- D
- E
- F
- C
- G
- J
- I
- H
Step 7
After you have taken note of the letter order, head back over to Adobe Illustrator and open the Swatches panel. If you do not see it, select Window>Swatches and it should appear.
Using the Selection Tool (V), select all of the colored letters by dragging a box around them. Select the New Color Group icon at the bottom of the Swatches panel seen in the picture below.
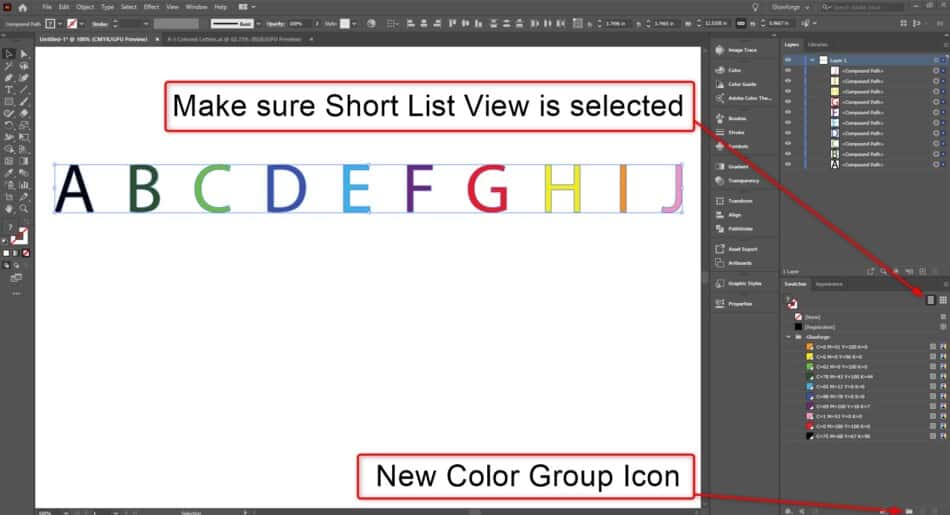
Name the Color Group something like Glowforge Swatches. Next, organize the new color group in a list format by clicking the Short List View icon if it isn’t already active.
Step 8
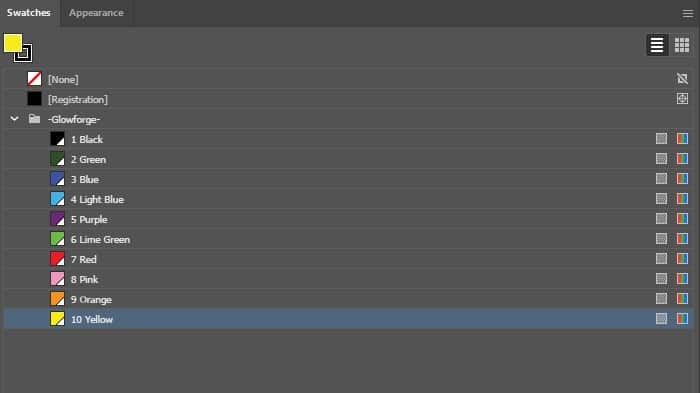
Click and drag each color in the swatch panel to match the numerical order of how the letters were arranged by the Glowforge interface.
In my example, the A with black fill was first, the B with green fill was second, the D with Blue fill was third, and so on.
Change the name of the colors by double-clicking each one in the Swatches panel. I suggest starting each color name with the number of its order as seen in the example below.
Step 9
Save your swatch by clicking on the 3 horizontal lines seen in the top right-hand corner in the picture above. Then select Save swatch library as AI.
Do not change the file location this time. Name it something like Glowforge Swatch, then select Save.
Step 10
To test your newly saved swatch, create any new file by selecting File>New>Print tab>Letter>Create.
Open the Swatches panel if it isn’t already visible.
Select the Swatch Libraries Menu>User Defined>Name of your swatch file.
When your saved swatch window appears, click the folder in the window to add your saved Glowforge swatch to the Swatch panel.
Now you have your own Glowforge order of operations color palette.
Additional Resources
*Important: Unless you save your workspace template in Adobe Illustrator, you will have to add your color palette any time you create a new document.
If you are interested in setting up a workspace template, which I highly recommend, check out this YouTube video from a fellow Glowforge user. He did an outstanding job creating a tutorial.
The Glowforge community forum offers a great discussion on color palettes for the order of operations using a few different design software programs. Find the discussion by clicking here.
The discussion contains an Adobe Illustrator premade swatch with instructions on how to install it which is what I originally used. However, sometimes I found that I needed a few more command blocks so I developed my own color palette and decided to create this article so others can do the same.
Hopefully, this guide will help you with setting up a color palette for the Glowforge order of operations and improve your workflow efficiency. If you would like to see any other articles on a specific topic or have any questions, shoot us an email at answer@jackforge.com or leave a comment. Happy laser crafting!