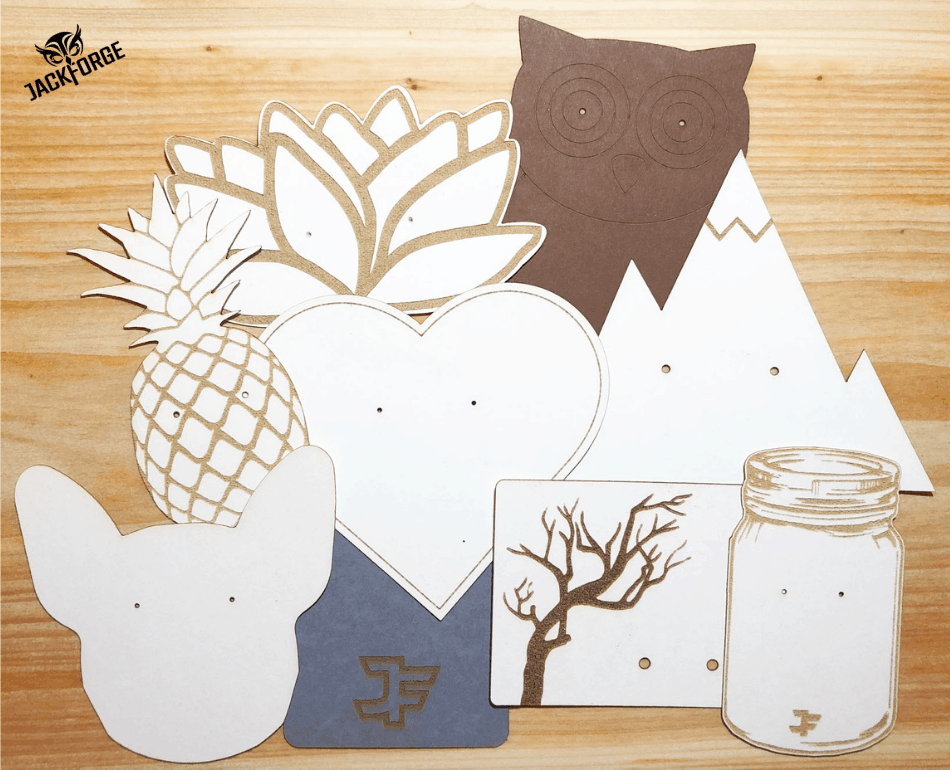
Making your own earring cards by laser cutting cardstock can be a way to offer unique product packaging. Not only can it be time efficient for small business owners, but it can also be cost effective when the volume isn’t there to obtain bulk pricing from companies selling customized earring cards.
Many people may not be aware that cardstock can be laser cut and engraved. Some may even think using a laser on cardstock would result in a fire, but the truth is that it can be a great medium for cutting and engraving. With a little bit of knowledge and creativity, anyone with a laser can make some great earring cards. Let me show you!
Which Cardstock Weight Should Be Used to Make Earring Cards?
Earring cards should be made using cardstock with high paper quality in order to provide durability and support for the earring. Heavy cardstock weighing at least 270 grams per square meter (gsm) or 100 pounds (lbs or #) will work well for making earring cards.
Paper quality is a measurement of its thickness and weight. Depending on the company, the measurement is expressed in lbs, gsm, or points (pt). The most commonly used measurements found on cardstock packaging are lbs and gsm. Usually both will be listed on the package. A quick discussion on these numbers will help you choose the best cardstock for your earring cards, as well as many other projects.
Pounds
Cardstock weight, in lbs, fluctuates according to the basic size of its manufactured sheet prior to being cut and packaged for retail stores. Therefore, the measurement (pounds, lbs, #) listed on the package is the weight of 500 sheets of cardstock that has been weighed immediately after its production process.
Selecting cardstock based on the weight written in pounds can be misleading at times because basic sheet sizes may vary between paper grades and paper mills. This means cardstock thickness can be different between styles despite listing the same weight in pounds.
Grams Per Square Meter
Weight listed in gsm is a much more reliable measurement for evaluating paper quality. This is because gsm is actually telling us the density which is calculated using a fixed area of measurement. Without getting too complicated, just remember the thickness and weight of the paper will increase as the gsm increases.
Points
The last measurement of paper quality is a point. Points are a direct measurement of the paper’s thickness by using calipers. Each point is equivalent to one-thousandth of an inch (.001 inch). For example, 14 pt paper is .014 in thick which is found by multiplying .001 by 14.
There are some conversion charts that approximate weight equivalents per point but the accuracy is limited for similar reasons as our discussion on using pounds. As a general rule of thumb, 14 pt paper or higher will work for earring cards.
Occasionally, these measurements are not listed on the packaging. If this happens, a google search of the brand and style may give you more information. If you are purchasing online and still can’t find them, check out the product reviews. When only one measurement can be found, stick to the minimum suggestions of 100lb, 270gsm, or 14pt.
Recommended Cardstock Brands
Cardstock Warehouse Paper Company
How to Make Earring Cards By Laser Cutting Cardstock
Now that you have a basic understanding of paper quality and some recommended brands, let’s go through the process of making earring cards. This tutorial was done using Adobe Illustrator and the Glowforge Pro.
*Specific details on using Adobe Illustrator are beyond the scope of this tutorial. Eventually, we hope to provide step-by-step video tutorials on multiple graphic design programs. In the meantime, you can find many excellent resources to assist you with using any graphic design program on Youtube.
Step 1
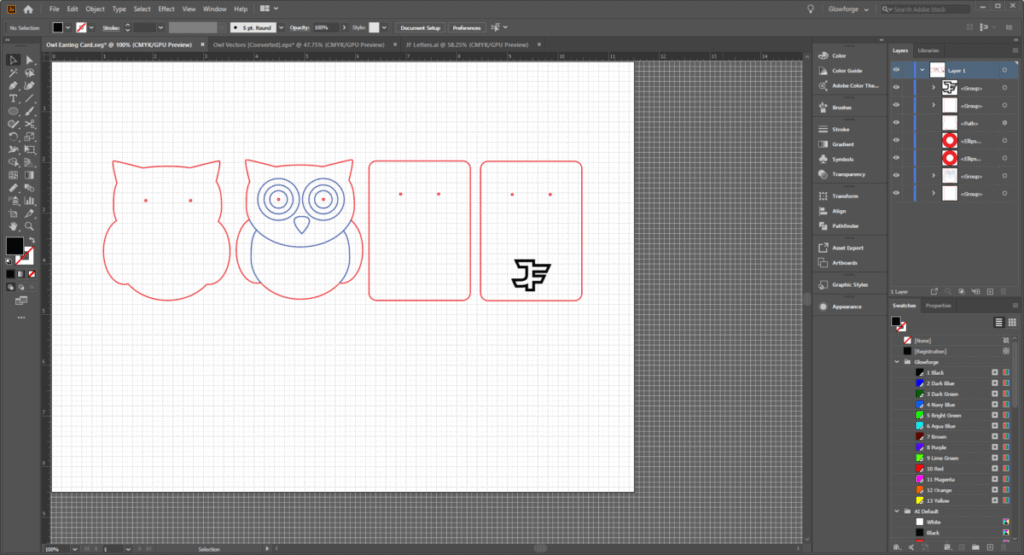
Using the design software of your choice, create the shape of your earring card. There are multiple ways to design shapes. Here are two ways to create shapes using Adobe Illustrator.
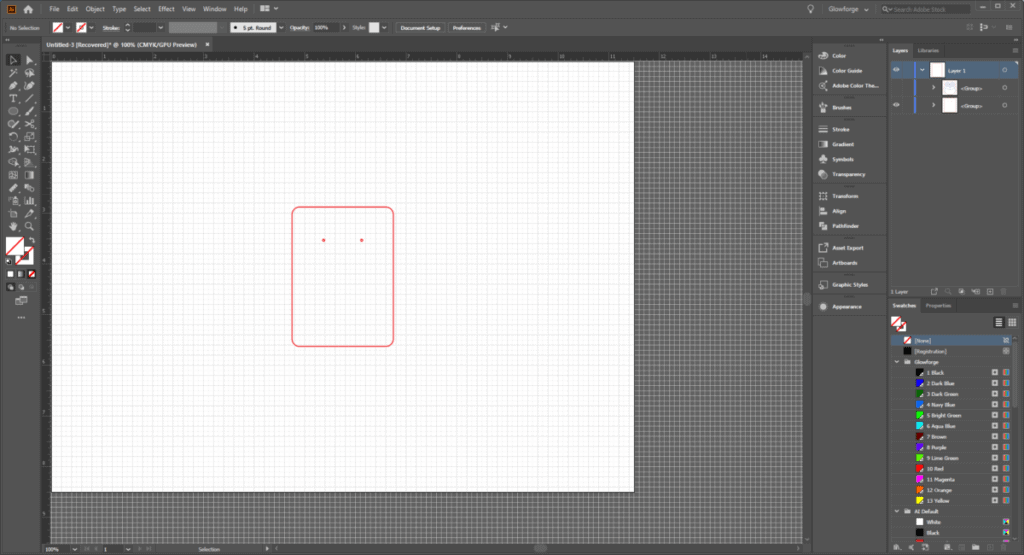
Simple Square Design
Create a rectangle. Make the corners round. Add two small circles for the studs in your desired location. Change the stroke color to red. Add other artwork such as a logo. Change the artwork to fill for engraving or stroke for scoring. Save the file as an SVG.
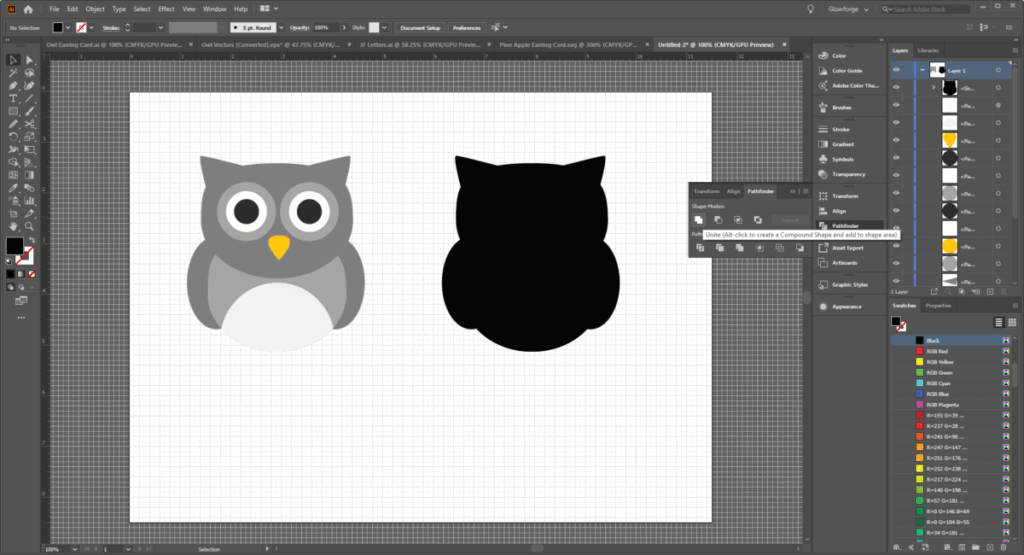
Complex Shape Design
Download an SVG file from the internet. Change all the fills to the same color. Merge the shapes into one large shape.
Switch the fill to a stroke. Change the stroke color to red. Add two small circles for the studs in your desired location.
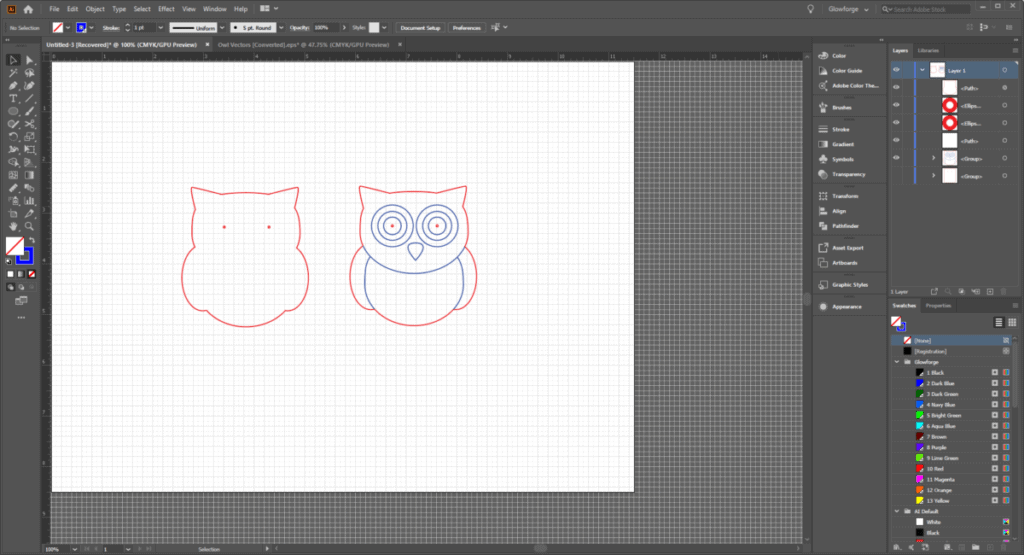
Add other artwork such as a logo. Change the artwork to fill for engraving or stroke for scoring. Save the file as an SVG.
Step 2
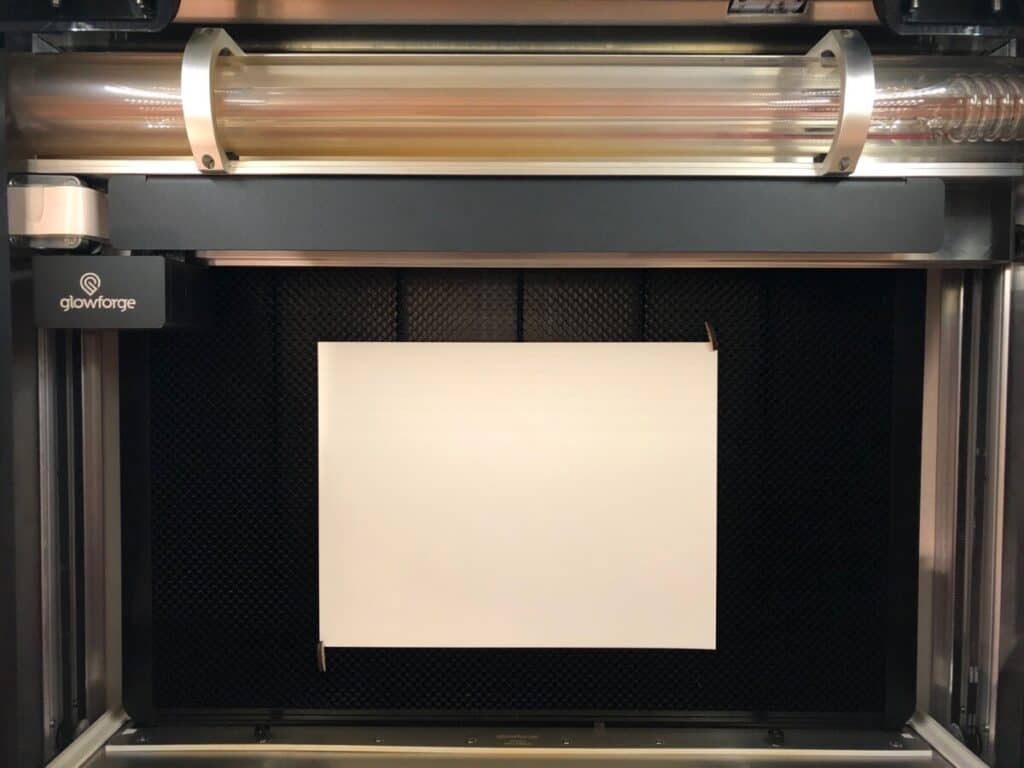
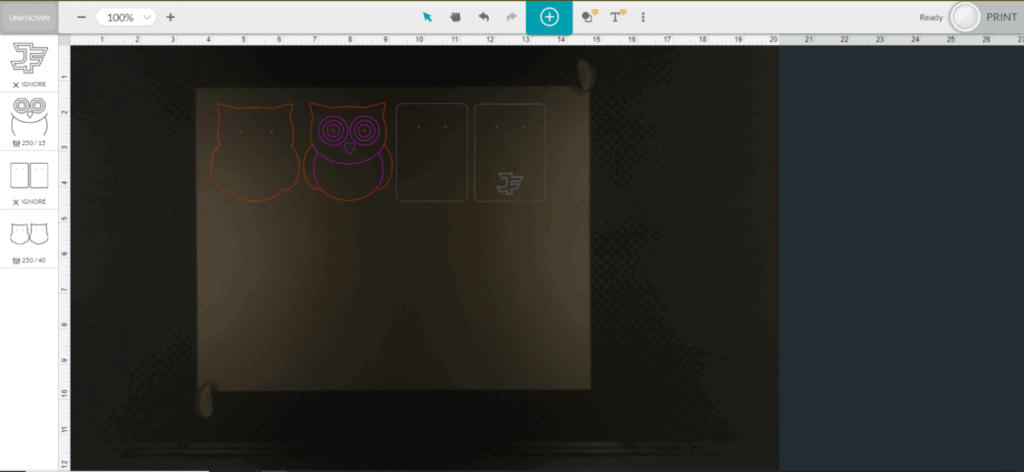
Upload the SVG file to the laser software. Load the laser with cardstock. Make sure you secure the cardstock using honeycomb pins or magnets.
Step 3
Enter your settings for the cuts, scores, and engraves, then start your laser. If you need help finding the right settings, check out this tutorial.
Step 4
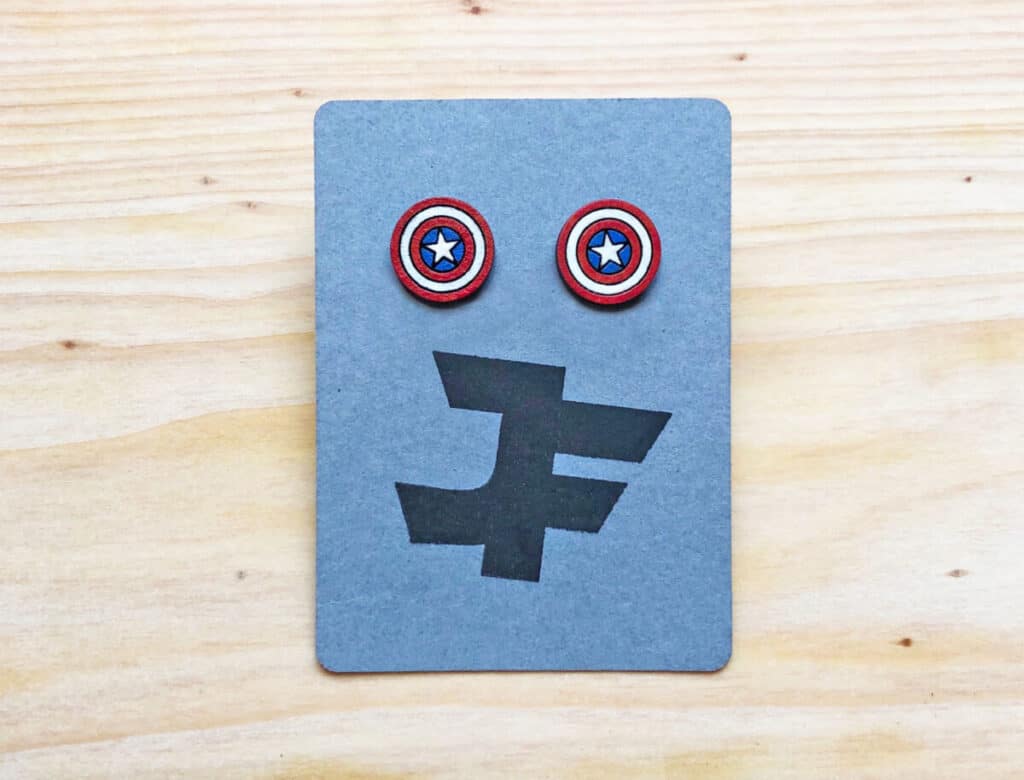
Make your earring cards even more attractive by adding other decorative details such as stamps, stickers, twine, etc. Add a set of earrings and you are all done!
Tips For Making Earring Cards
- Use stencils with ink, markers, or paint to make your earring cards even more amazing.
- Earring cards can serve multiple purposes by adding a message or business information.
- Save money by pairing your earring cards with packaging that is laser cut from cardstock.
- Explore the talent on Pinterest for inspiration and ideas.
- Try converting silhouettes to outlines for creating quick and easy shapes for your earring cards.
Hopefully, you find some value in this tutorial. If you would like to see any other tutorials or have any questions, shoot us an email at answer@jackforge.com.