Splitting paths or shapes in Adobe Illustrator can be a very useful tool when designing for the Glowforge or any other laser. Sure you can use the Direct Selection Tool, Scissors Tool, Knife Tool, etc. to split your paths, but what if you have a lot of splitting to do. The process could be very time-consuming.
Wouldn’t it be easier if there was a way to split a path or shape simply by hitting a button? Well, it took a lot of searching and experimenting but I finally found a way to make this happen.
Continue reading to learn how to make an Adobe Illustrator action that will quickly split a path or shape at all of the anchor points with the push of a button.
If you just want a premade Adobe Illustrator action, click here to head over to the free downloads page where you can get it.
What Does Splitting a Path Mean?
Splitting a path is simply breaking up a line or shape anywhere along its segment or segments to create additional paths.
In the example below, the black star is one whole path or shape. The blue star was split at every anchor point resulting in 10 new paths.

Of note, I pulled the segments in the blue star apart for easy viewing of this concept. If I simply split all the paths but did not move any of them, both stars would still cut and score just the same.
In other words, splitting a path does not directly affect the laser cutting or scoring process. The process is only affected by what you do to the individual paths after splitting.
For example, changing the color of half the paths or segments from the blue star will register as two separate command blocks in the Glowforge interface.
For more information on how color affects the Glowforge command blocks, check out this article on creating a color palette for the Glowforge order of operations.
Why Would You Want to Split a Path?
Before we dive into the tutorial, here are a few reasons why you would want to split a path or shape.
- Splitting a path can help you easily delete sections where two paths are overlapping. This will prevent unnecessary additional laser passes when cutting and scoring.
- A split path is sometimes necessary in order to join sections of two separate paths together.
- When paths are split, you can easily manipulate and/or delete part of the path or sections along the path.
- It allows you to change the stroke color along the same path so you can assign different laser commands (as seen in the article’s featured image). For example, you could cut and score two different segments along the same path.
- Splitting a path is an easy way to borrow specific sections of one design to use in another. For example, I have used finger joints created by a box generator for various other projects so I don’t have to create them from scratch.
Splitting Paths Quickly Using an Adobe Illustrator Action
An Adobe illustrator action is a group of saved functions that operate in a specific order any time the action is activated.
Actions can be very useful for saving time, especially when you perform the same functions over and over. Click here, if you want to read more about Adobe Illustrator actions.
The specific commands, in order, for the action we are about to build is as follows:
Select the object or objects with the Selection Tool
Select > Object > Direction Handles
Edit > Cut
Delete the remaining anchor points
Edit > Paste in Place
Step 1
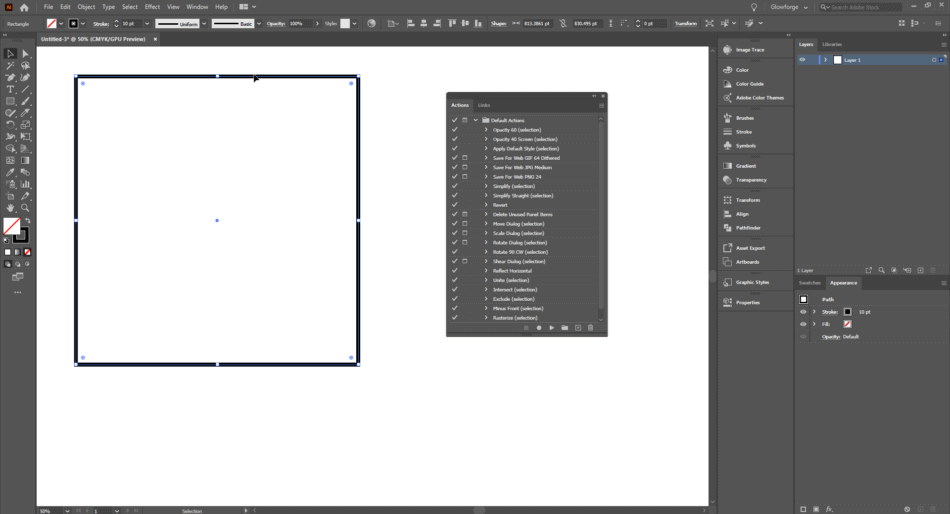
Create a new Illustrator document. The size of the document does not matter. Using the Rectangle Tool to create a square (no fill, black stroke) of any size.
Select Window > Actions to pull up the Action Window. The Default Action Set will most likely be expanded. Close the expanded set by clicking the Drop-Down Arrow next to the Default Action Folder.
Step 2
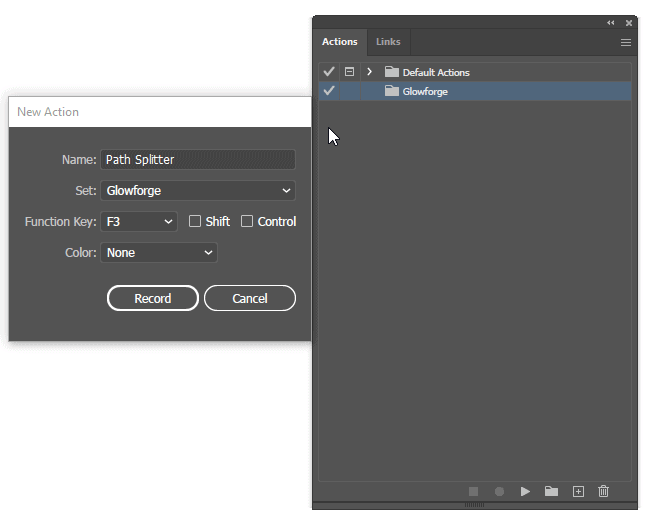
Select Create New Set (Folder icon) at the bottom of the Action Window. Name it Glowforge. Select the Glowforge set you just created, then select Create New Action (Square with a plus icon) at the bottom of the Action Window.
Name the action, Path Splitter. Select a hotkey if desired. I chose the F3 key since I do not use it for anything else in Illustrator.
Check the shift or control box if you want your hotkey to require holding shift or control plus the function key. I left these boxes empty. I also did not worry about selecting a color as it does not affect the hotkey.
Step 3
Select Record. After selecting Record, it is important to follow these next steps closely so unwanted functions aren’t added to the action set.
Select the Selection Tool, then select the square you created. Now select these commands:
Select > Object > Direction Handles
Edit > Cut
Edit > Clear
Edit > Paste in Place
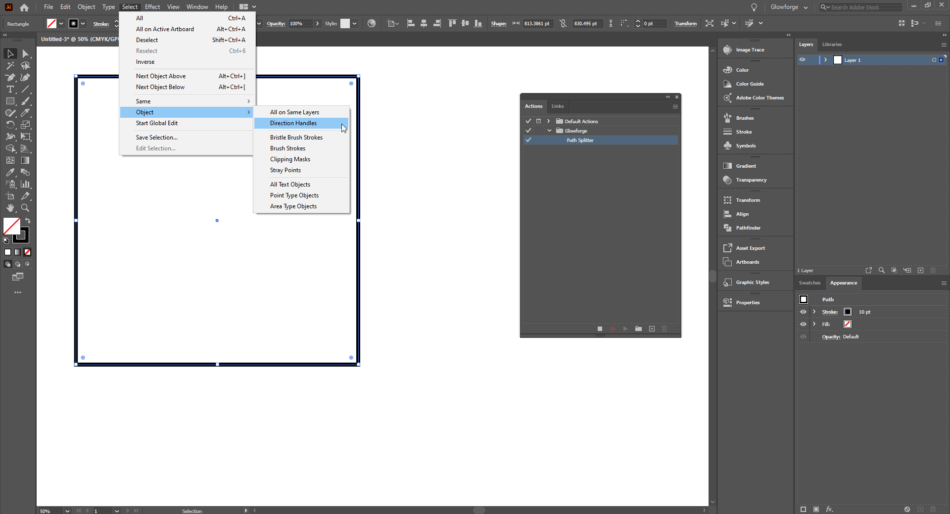
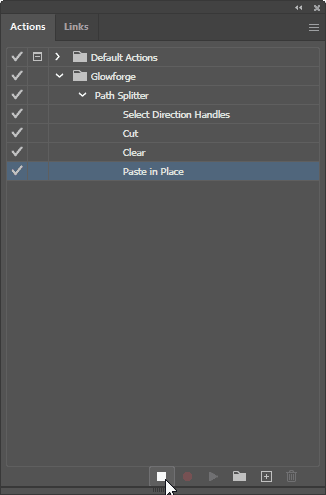
If done as directed, the Action Window should look like the picture below. Next, hit stop recording (the white square at the bottom of the Action Window).
Step 4
Test your action by creating a new square with the Rectangle Tool. Select it with the Selection Tool, then press the hotkey you chose for the Path Splitter Action we just created.
The square should be split into four paths or segments that can be manipulated individually. Pull the pieces of the square away one by one for confirmation.
Step 5
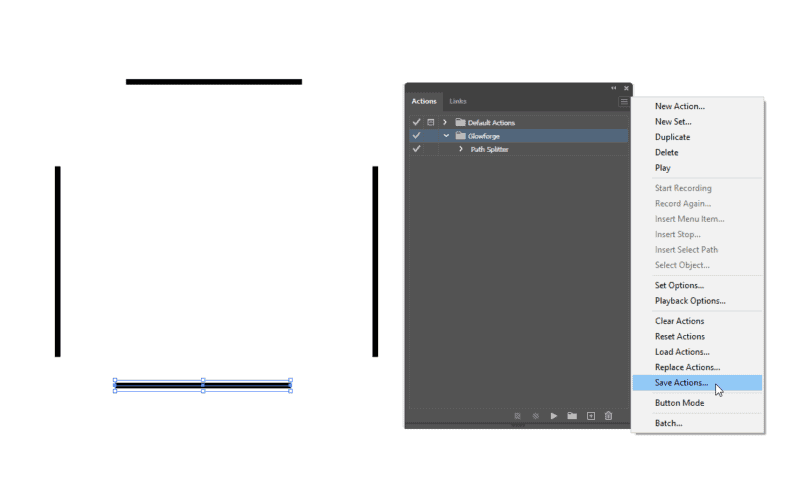
Save your new action by selecting the Hamburger menu (three-line icon) in the top right-hand corner of the Action Window. Then select Save Actions.
Choose a folder that you can easily find incase you need to reload the action in the future. I suggest creating a folder with the name Illustrator Actions.
Now you can use this Path Splitter action to split any path or shape in seconds. It will also work on multiple paths or shapes at the same time.
After splitting a path, you can easily join them back together by:
Selecting the anchor points > Object > Path > Join
Loading the Illustrator Action
If the action isn’t there the next time you open up Illustrator, you can easily load it by selecting Load Actions found under the Action Window Hamburger menu which can be seen in the picture above.
Navigate to the folder where you saved your Glowforge Action set, then open it. You are all set.
I hope this tutorial and action will help you with your laser design workflow. If you have any questions, please feel free to send an email to answer@jackforge.com. Happy Laser Crafting!